Showing posts with label craft. Show all posts

Thursday, December 3, 2015

How to repair a broken necklace

A year ago, my friend and I went to a restaurant to celebrate my Birthday. My friend was wearing a pretty chain and bead necklace she purchased at the department store. Suddenly, the necklace broke into 2 parts and all the beads went to the floor! My friend was so upset. I told her I have a friend who could repair this, or possibly, make a new one from what's usable. We spend 10 minutes gathering the beads and chains. I put them in my purse and that was the end of unfortunate event that day.

During one of our craft gatherings with Albina Manning (albinasjewelry) I showed her the pieces. So we thought of what we could possibly do with these. We played with the chains and beads a little, added some new pieces and voila, and we made a pair of earrings and one great tear shaped necklace. A lovely set to wear for a New Years Eve!

If you will ever need to repair or remake yours, here is Albina's notes on how she repaired the one we had. Make the necessary adjustments while creating your piece!


"I opened all jump rings to separate the beads and "curvy" pins. I decided to use already made loops that beads had.  
 Check out all the loops - if the loop was not closed properly, just close the loop with round nose pliers.

To make the earrings, I used 12 beads, 2 double looped pins, 4 jump rings, and a pair of ear wires.

Slide 6 beads and a pin onto a jump ring. Close a ring. Take another jump ring and attach the second pin's end and an ear wire; close a jump ring. 

Repeat these steps to make the 2nd earring.

Pendant: 12 beads, 1 double looped pin, 2 jump rings, chain with a clasp.


Slide 6 beads and a pin onto a jump ring. Close a ring. Take another jump ring and attach 6 beads, the second pin's end, place a chain into a jump ring; close a jump ring.

IMPORTANT: close all the jump rings properly, if there is a gap, you will loose the beads. "

Friday, November 7, 2014

Holiday craft, wine stopper DIY

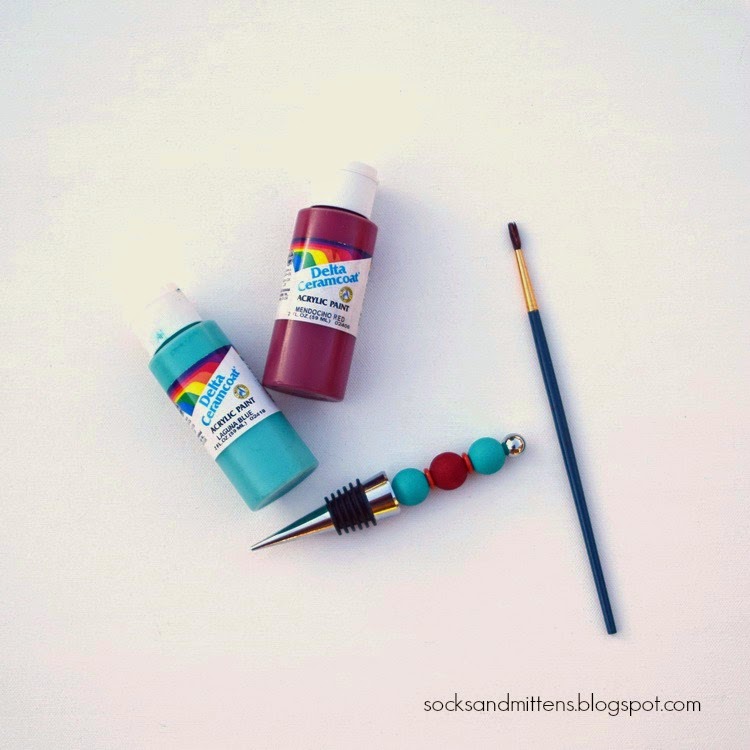
This DIY colorful wine stopper is another great quick project to decorate your party table.
 

https://www.flickr.com/photos/snakeandrose/15727089191/in/photostream/
All you need is a pre-made wine stopper and some beads of your liking (I bought mine at Michael's but you probably will find them at your local craft store).
I chose the unfinished wooden beads for my project and I wanted some color so I painted my beads with acrylic paint. I used some acrylic coral beads in between.
So it's really easy: choose the beads and arrange them in the order you like. Make sure they will fit to your cork stopper pole.
 
If you are happy with the future look, undo the arrangement and paint the wooden beads in the colors of your choice. Let them dry thoroughly. If you'd like, use the clear finish on top. Arrange the beads on stopper pole in the planned order.
https://www.flickr.com/photos/snakeandrose/15109625113/in/photostream/
That's it! Have fun decorating!

Tuesday, July 31, 2012

Etsy live in Ukraine

My vacation is over and I am happy to be back home. The trip to Ukraine was full of emotions and new impressions. I was very happy to see my old friends, family and was lucky to meet new friends.

One of the trip highlights was a very nice evening with fellow etsyans from the Russian Artists Team. 
 We met downtown at the green park full of wonderful old trees and great architecture. We sat and talked at a little cafe and exchanged the cutest gifts. 
 Then we walked on the evening city streets full of lights, life and people. I had a wonderful time. I wish I could do this more often.

Thank you, girls for finding time to meet with me:
 Daria from Dariami

Maria from LovelyTrifles

Natasha from Grimme

Polina from Beautyspot


I wish you best of luck and hope we'll meet again!

Friday, March 4, 2011

How to make a tri-fold card for your cross stitch

Home made cards are great as a gift to a friend who lives far away. They show that you care!

I like to add some stitching to my cards so I am either making window cards to put my miniature stitching in or just glue them to a piece a cardstock to decorate my card with.


Today I will show you how to make a tri-fold card.


You need:

An envelope, approximate size 3 3/8" by 5 3/4",

A decorative cardstock, approximate size 5 1/2' by 11"

Your scrapbook supplies: a cutting mat, exacto cutting knife, template for oval op
ening, ruler, rotary trimmer, small scissors and a pencil

Divide your cardstock to 3 even parts and fold sides to the middle with a help of ruler. Fold all 3 sides and check if you need to adjust the size of card. I am usually trimming cards as needed to be perfectly rectangular.

With pencil and ruler, find the center of the middle section on the back side of the card and mark it. Place your cardstock on a protective cutting mat with the back side facing you. Place your oval template so it is centered over the center point. Cut the shape with your exacto knife, then turn your card to the front and see if you like how it turned out. If it needs some adjustments make it with your small needlecraft scissors.

Fold your card, and it is ready for you to place your stitching!

Sunday, February 13, 2011

Felted acorns

When we opened our shop on Etsy in the summer of 2009 I came across a lot of wonderful people, got many creative ideas and learned about new techniques. I loved many of them but one of craft areas attracted my attention most was felting.

I don't have any plans to make this my full time hobby but I'd like to make something small for myself from time to time.

So of course I have been looking at easy-to-follow tutorials since this is a new craft for me. I was thinking of cute felted acorns I saw on Etsy and I was hoping to make something like this. I searched some blogs and found this great tutorial from Tonya.
I immediately purchased some roving wool and made some of these yellow mustard colored acorns.
Aren't they cute?
The process of making beads is not very simple. The beads don't want to be perfectly shaped and some of them still have a little crack in the middle. But it was my first attempt so hopefully it will become better with practice. With the additional I am going to make I may have enough to decorate our Thanksgiving table next fall.
Thank you, Tonya, for the great tutorial, I really enjoyed making these!

Midwinter sale at socksandmittens

  Mid winter sale at socksandmittens on Etsy! Get 10% off on any item in my shop January 15- February 1, 2024. No coupon code needed! St...